Ah, the smell of freshly-baked pan bread! There's nothing quite like it! It's no wonder then that the production of pan bread is a booming industry. From small family-run businesses to large scale operations, everyone loves a good loaf of pan bread. But what does it take to produce this delicious baked treat? In this article, we'll explore the art and science behind pan bread production.
From making the dough to baking it in the oven, there are many steps involved in creating pan bread. Every baker has their own special recipe and technique for producing that perfect loaf. However, some basic steps remain true no matter who is baking. First, all the ingredients must be gathered and combined into one homogenous mixture. Then the dough needs to be kneaded until it reaches its desired consistency.
After that, it's time to shape and bake the dough in an oven at a precise temperature for just the right amount of time.
Finally, once out of the oven comes that wonderful moment when you can finally enjoy your warm and delicious home-baked pan bread! The joys of eating a freshly baked loaf are undeniable - no wonder so many people love to bake their own! Now let's dive deeper into how this amazing food is produced from start to finish!
Blog Series: A Beginner's Guide for Fry Pan Production

Definition Of Pan Bread Production
Pan bread is a type of flat, round loaf that's baked in a shallow pan. It typically has a soft, moist crumb and can be made from any type of flour or grain. It's often used for sandwiches and toast.
The dough for pan bread is usually prepared with yeast or baking soda, depending on the recipe. The dough is kneaded until it becomes smooth and elastic, then it's left to rise for several hours. After that, it's shaped into rounds and placed in pans before being baked in an oven.
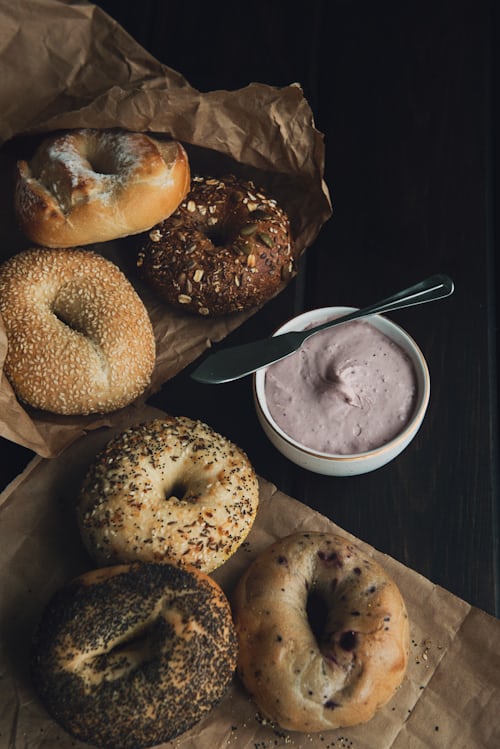
Pan bread is a convenient and versatile option for home bakers who don't have access to traditional ovens or brick ovens. It can be served warm or cold and can easily be adapted with different ingredients such as nuts, dried fruit, olives, herbs, spices, cheeses, meats and vegetables. With so many possibilities, pan bread offers endless possibilities for creative cooks!
Baking Basics
Now that the definition of pan bread has been clarified, let's move on to the basics of baking it. Baking pan bread requires some special considerations. First and foremost, it's important to use the correct size and type of pan when baking. Depending on the type of bread being made, different sizes and shapes of pans may be necessary.
For example, if you're making a round loaf, you'll need a round cake or pie tin; for a loaf-shaped bread, you'll need a longer loaf pan. The material used to construct the pans is also important; aluminum or nonstick pans are ideal for baking artisanal-style loaves.
The oven temperature is also critical in baking pan bread. It must be preheated before placing the dough in the oven so that the bread can rise correctly and cook evenly throughout. To ensure even rising and browning of the crust, place your loaves in an oven with both top and bottom heating elements activated at once. In addition to these basics, make sure to read any recipes carefully before beginning as they can provide further tips for success with your breads.
With all this information in mind, it's time to start baking! Be sure to use quality ingredients and follow all instructions carefully for best results. With practice, you should be able to create delicious pan breads every time!
Types Of Flour And Yeast
Flour is the main ingredient for pan bread production. Different types of flour are used, depending on the desired texture and flavor of the bread. All-purpose flour is the most common type used, as it produces a light and fluffy texture. Other types of flour include cake flour, which produces a more tender texture, and whole wheat flour, which gives the bread a richer flavor.
Yeast is also an essential ingredient in making pan breads. Yeast helps to leaven the dough, creating a light and airy texture. Active dry yeast is typically used for pan bread production as it has been pre-treated with heat to deactivate its growth until it is activated again by adding water. Instant yeast does not need to be pre-treated and can be added directly to the dough mixture.
Using the right combination of flours and yeast can ensure that your pan breads are perfectly textured and flavorful every time. With a little practice, you will be able to create beautiful loaves of homemade pan bread at home with ease!
Preparing The Dough
Making a pan bread requires an experienced baker to carefully prepare the dough. The ingredients must be accurately measured and mixed together in the right order.
The most important ingredient is flour. It's essential to use a high-quality, unbleached all-purpose flour for pan breads. The baker should sift the flour over a bowl or onto a pastry board to ensure that it is evenly aerated and free of clumps. Then, salt and sugar are added to the sifted flour, which helps regulate yeast activity and add flavor.
Yeast is also an essential ingredient for making pan breads. Active dry yeast should be used, as it has been specially formulated for baking. Yeast should be proofed before adding it to the dough by combining it with warm water and sugar until foamy bubbles appear on top of the mixture.
After this step is completed, all of the dry ingredients can be combined with butter or oil, eggs, milk or water, and finally the proofed yeast mixture to create a soft dough that can be kneaded until it becomes smooth and elastic.
Rising Times And Techniques
Having prepared the dough, it's now time to focus on rising times and techniques. This is an important step in making pan bread that will be light and fluffy.
The first technique to consider is temperature control. Dough that rises too quickly can become overproofed and dense. Heat accelerates rising, so ideally it should be kept at a temperature between 75-85°F (24-29°C). If you don't have access to a kitchen thermometer, you can use your hands to check the dough's temperature; it should feel warm but not hot.
The second technique is kneading the dough regularly throughout the rising process. This helps develop gluten strands within the dough that give it structure and support for baking. Kneading also helps soften the texture of the dough as well as trap air bubbles, giving it lift when baked in a pan. To knead properly, use your hands to push down into the dough then turn it over and repeat until you have a smooth, elastic consistency.
Rising times will vary depending on the recipe and specific conditions such as altitude or humidity level in your environment. Generally speaking, most recipes call for two rises: one before shaping and one after shaping before baking. The goal is to double or triple in size while still retaining its shape when handled gently. Keep an eye on your dough during this time to ensure it doesn't rise too quickly or collapse due to changes in temperature or humidity levels.
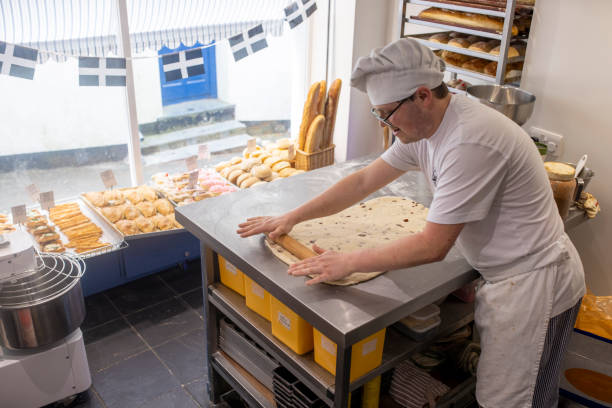
Shaping The Dough
Once the dough is ready, it's time to shape it for baking. Roll out the dough on a lightly floured surface until it's about 1/4-inch thick. Then, use a knife or pizza cutter to cut the dough into rectangles. It's important to make sure each rectangle is evenly sized, so they all bake at the same rate. If desired, you can brush each rectangle with some melted butter and sprinkle with sesame seeds or poppy seeds for extra flavor.
Next, pick up one of the rectangles and fold it in half lengthwise. Then, carefully stretch the edges of the folded dough and press them together firmly to seal. Place this shaped piece of dough onto a greased baking sheet or pan. Repeat this process with each of the remaining pieces of dough until you have a baking sheet full of shaped breads.
Bake at 350F for 20 minutes, or until golden brown and cooked through. Enjoy your freshly-made pan bread!
Baking Temperatures And Timing Of Pan Bread Production
Once all the dough has been shaped, it's time to bake the pan bread. This process requires precise temperatures and timing in order to ensure a perfect outcome.
To begin, preheat the oven to 350°F. This is the optimal temperature for baking pan bread, as it allows for even heat distribution throughout the loaf and prevents burning on the bottom or sides. Place the loaves on a greased cookie sheet and set a timer for 25 minutes. During this time, keep an eye on the loaves - they may need to be rotated in order to ensure even browning. The loaves are done when they are golden-brown in color and sound hollow when tapped.
Finally, remove from the oven and let cool before slicing or serving. Enjoy!
Cooling, Slicing And Storing
Once the pan bread is finished baking, it needs to be cooled. The pan should be taken out of the oven and placed on a wire rack. This allows for air to circulate around the entire loaf, helping it cool down more quickly. Leaving the bread in the pan too long can cause it to become soggy and hard.
Once cooled, the bread should be removed from its pan and sliced. It's best to use a sharp serrated knife for this, as it won't compress or tear the tender crumb of the loaf. Slice evenly for uniformity in size and shape; this also helps when freezing or serving slices later on.
Finally, if not eaten immediately, store pan bread at room temperature in an airtight container or bag so that it stays soft and fresh. If desired, slices can also be frozen in an airtight bag or container for up to three months.
Common Ingredients Of Pan Bread Production
Pan bread production typically involves several common ingredients, including flour, water, salt, yeast and fat. Flour is the main ingredient in most types of pan bread and provides an essential structure for the finished product. It also helps to develop flavor and texture. Water activates the yeast to create a fluffy texture and helps bring out the flavor of other ingredients.
Salt adds flavor, while yeast helps the dough rise during baking. Lastly, fat enhances the flavor and texture of pan bread by providing a richer mouthfeel.
The amount of each ingredient used in a particular recipe depends on a number of factors such as desired texture, flavor profile and budget constraints. For instance, if a softer crumb is desired more water may be used but this could come at the cost of reducing other flavors like salt or yeast which can have a detrimental effect on overall taste and quality.
Fat can also be adjusted depending on how much richness is desired from the finished product; too much fat can make the dough greasy or heavy while too little will give it an unpleasantly dry mouthfeel.
Careful consideration should always be given when selecting ingredients for pan bread production - using only quality ingredients will ensure that you get the best possible results every time.
Flavoring Options
Flavoring options for pan bread production are plentiful. Bakers can choose to add a variety of herbs, spices, fruits, vegetables, nuts and seeds to their doughs. These ingredients can be used to create unique flavors as well as enhance the existing flavor of the bread. Herbs and spices such as rosemary, oregano and thyme can be added directly to the dough or sprinkled on top before baking. Fruits such as raisins and cranberries can also provide a hint of sweetness when added to a savory loaf.
Additionally, vegetables like onions and peppers can offer an unexpected bit of crunchiness when included in a loaf. Nuts and seeds are also popular additions that provide texture in addition to flavor.
When adding any type of flavoring ingredient, it is important to consider how much should be used so that the flavor is not too overpowering or understated. For example, using small amounts of herbs or spices will create more subtle flavors than if large amounts were used.
Additionally, some ingredients may require pre-cooking before being added to the dough in order to ensure their flavor is properly released during baking. To get the most out of your flavoring ingredients, it is important to experiment with different combinations until you find one that works best for you.
By taking advantage of these flavoring options during pan bread production, bakers can create delicious loaves that stand out from the competition. With just a few simple additions, bakers can turn an ordinary loaf into something extraordinary that customers won't forget!
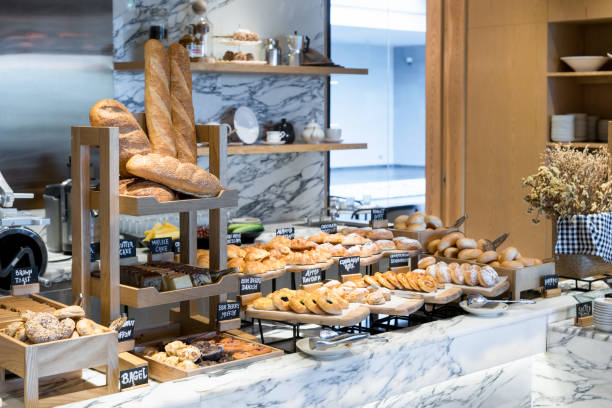
Specialty Varieties
Pan bread production has expanded to include many specialty varieties. These include whole grain, multigrain, and sourdough breads. Whole grain bread is made with whole grains, including wheat, oats, barley, and rye. Multigrain bread is made with a mix of different grains such as quinoa and other ancient grains.
Sourdough is a traditional method of making bread that uses naturally occurring yeasts and bacteria to leaven the dough. It has a distinctive tangy flavor that has become more popular in recent years.
The process of producing specialty varieties is slightly different than standard pan bread production. Generally, the dough requires more time to rest and rise before baking. This allows flavors and textures to develop more fully before the baking process begins. Specialty recipes also often require the use of unique ingredients such as seeds or nuts that are not used in standard loaf recipes.
Bakers must be familiar with the different processes for creating specialty varieties and how these affect their end product. With careful attention to detail and an understanding of how each variety should taste and look when it comes out of the oven, bakers can create delicious loaves that will appeal to any customer's palate.
Troubleshooting Tips
Moving on from specialty varieties of pan bread, it is important to understand some tips for troubleshooting common issues that can arise in production. The first tip is to ensure that the yeast is active and healthy. If the dough does not rise properly, the yeast may be too old or not stored correctly. Additionally, make sure to use the correct temperature for proofing; if it is too hot, the dough will overproof and become dense, while if it is too cold, the dough will not rise properly.
The next tip is to knead the dough correctly. Kneading helps develop gluten strands which give structure and strength to the bread. If there are large air bubbles in the finished product, the dough was likely underkneaded. On the other hand, over-kneading causes extreme toughness in breads due to an excessive amount of gluten formation.
Finally, temperature plays a major role in baking success. Too low of an oven temperature won't allow for proper baking and browning of crusts. Too high of an oven temperature will cause burning before rising has finished taking place inside loafs or rolls. It's important to keep a consistent oven temperature throughout baking time as well as adjust when necessary depending on recipe instructions or visual cues from loaves or rolls being baked. With these helpful tips at hand, pan bread production can be successful every time!
Equipment Requirements Of Pan Bread Production
Producing pan bread requires certain equipment in order to ensure that the baking process is successful. The most important piece of equipment is an oven. The oven should be capable of reaching a temperature of between 350-400 degrees Fahrenheit, and also have proper insulation so that the heat can be evenly distributed. Additionally, the oven should have an adjustable timer.
A stand mixer is also necessary for producing pan bread. This will help make sure that all ingredients are thoroughly mixed together before being placed into the pan for baking. A rubber spatula or wooden spoon can also be useful for scraping down the sides of the bowl during mixing. It is important to note that a stand mixer with dough hooks will result in a better mix than one without them.
In order to bake perfect pan bread, it is essential to have a good quality loaf pan. It should be non-stick and heat resistant, as this will help prevent sticking or burning during baking. Furthermore, having two pans allows for two loaves to be baked at once, which can speed up the production process significantly.
Advanced Baking Techniques
Advanced baking techniques can greatly enhance the quality of your pan bread production. To ensure consistent results in each batch, proper temperature maintenance is essential. Temperature control throughout the baking process helps to maintain the desired texture and crumb structure of the finished product. It also ensures that crust formation is uniform and that the loaf has a more desirable appearance.
Another technique to consider is using starters or pre-ferments in your dough formulations. They give an extra boost of flavor, as well as improve overall structure and shelf life of the finished product. For example, sourdough starters have been used for centuries to impart a unique flavor to breads and are still popular today.
Similarly, biga, poolish, and sponge starters allow for more complex flavors and longer fermentation times which contribute to better texture, flavor, and keeping qualities in pan loaves.
The use of different flour types can also make a significant impact on your pan bread production. Combining different flours can help create unique flavor profiles as well as improved texture characteristics such as increased aeration or chewiness. Experimenting with various blends will allow you to find the perfect combination for your desired outcome. With these advanced baking techniques at your disposal you will be able to produce high quality panbreads with ease!
Nutritional Benefits
Now that you have learned more advanced baking techniques, it's time to discuss the nutritional benefits of pan bread production. Making a loaf of bread from scratch involves combining simple ingredients like flour, salt, sugar and yeast. This combination can offer a variety of health advantages, depending on the type of flour used.
Whole wheat flours are packed with essential nutrients such as Vitamin B6, iron and magnesium. They also contain healthy amounts of dietary fiber which helps regulate digestion and cholesterol levels. Whole wheat flours are also an excellent source of carbohydrates for energy. White flours provide fewer nutrients but still contain important minerals like calcium and iron as well as carbohydrates for energy.
Overall, making your own bread from scratch offers numerous benefits in terms of nutrition and taste. The freshness and flavor of homemade bread is hard to beat. Plus, you can choose the type of flour to use based on your individual needs or preferences. Enjoying freshly-made pan bread is a delicious way to get much-needed vitamins, minerals and other nutrients into your diet!
Conclusion
To conclude, pan bread production is both an art and a science. As a baker, you need to understand the basics of baking and be familiar with the different types of flour and yeast. You also need to know how to prepare the dough, give it enough rising time, and know how to troubleshoot any issues that may arise. Additionally, you need the right equipment for the job. Once you master these skills, you can move on to more advanced techniques such as scoring or shaping your loaves.
Not only do these methods result in beautiful pan breads but they also have many nutritional benefits. I hope this article has provided you with a better understanding of pan bread production so that you can confidently create delicious baked goods in your own kitchen!